Home Improvement

Tips For Painting Inside Of Cabinets

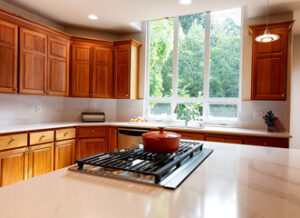
Painting Inside Of Cabinets are not only a great way to update the look of your kitchen, it’s also fairly easy. The most important step is surface prep.

painting

Avoid using traditional wall paints for cabinet work, they can’t stand up to moisture and the wear and tear of daily use. A water-based alkyd or acrylic enamel paint is the best choice, they dry quickly and clean up easily with soap and water.

Many DIYers are tempted to skip the sanding step when painting cabinets, but this is a critical part of surface prep that helps ensure paint adhesion and a smooth finish. Sanding also helps smooth out any bumps, dents or scratches that might show through the new finish. To do a thorough job, use a sanding block and sandpaper with varying grits to remove any existing finish or paint. Start with coarse grit, such as 80 or 100, to roughen the surfaces and then move on to finer grit, like 120 or 220, to make sure all surfaces are smooth and ready for primer or paint.

After sanding, clean all surfaces to remove any dust particles and greasy residue. You can use a shop vac with a brush attachment or simply wipe everything down with a damp rag or tack cloth to be certain all surfaces are dust-free and ready for priming or painting.

Before you begin painting, make a diagram of your cabinets and number each door and drawer front to identify them when they are removed. This will help you reinstall them correctly once the cabinet painting is complete. It’s also a good idea to cover your countertops and floor with a drop cloth or tarp to protect them from any paint drips or splatter that might occur during the project.

Some cabinet painting kits come with a de-glosser that removes any older coats of paint and eliminates the need for sanding before applying a new finish. If you are using a kit, follow the directions to be sure your cabinets are properly prepared for your chosen finish.

While alternatives to sanding do exist, they may not be as effective for all cabinet materials or surface conditions, and they often require much longer dry times than sanding before painting. In the end, sanding is still the most reliable and versatile method for achieving optimal paint adhesion and a smooth finish. If you choose to skip this step, your new finish will likely have problems adhering and your cabinets will look less than professional.

Primer

A good primer makes a big difference. It provides a surface that paint can stick to, and it helps cover imperfections and other problems. It also creates a barrier to prevent stains from bleeding into the new paint color. Choose the right type of primer for the surface you are painting. There are latex, oil-based, and shellac primers that can be used for cabinets. Oil-based primers are usually recommended for old cabinets painted with oil paint because they will seal the surface. However, you should always use a water-based topcoat over an oil-based primer to avoid potential problems.

Using the wrong type of primer will lead to poor adhesion and your new paint job will likely come off in short order. This is a common mistake because many people don’t think that they need to prime when they are re-painting their cabinet doors. It is important to use a high-quality primer that will be compatible with the type of paint you are using.

Before you apply a primer, scuff sand the surfaces you are going to paint. This will remove any glossy sheen and provide a better grip for the primer. If you have existing cabinets, it is a good idea to use an electric sander for this task to make it faster and more effective.

After sanding, wipe the cabinet surfaces down with a damp cloth to remove any dust or residue. Then, let the surfaces dry completely before continuing. You should also clean all surfaces thoroughly to remove any dirt or grease. It is important to note that paint does not bond well with greasy surfaces so make sure that you use something like Krud Kutter or another de-greaser on the surfaces where you will be applying the primer.

Most primers will contain additives that help block stains so that they do not show through the final paint job. This is particularly helpful for surfaces that are prone to staining, such as walls in bathrooms and kitchens. These types of primers will often also contain anti-corrosive ingredients for metal surfaces that are exposed to moisture.

Paint

Painting cabinets can be a daunting task for the home owner. There are many things to consider, from the type of paint to the proper application technique. If you aren’t familiar with these, it can be easy to make mistakes that can ruin the look of your kitchen or other room. This is why many homeowners decide to hire professional painters to do the job for them.

Before you start the cabinet painting process, it is important to take out all of your items from inside of the cabinets. This will ensure that you can get to the areas that need to be painted without worrying about moving or losing anything. Then, it is a good idea to use a shop vac or other type of vacuum to remove the dust and debris from the surfaces that need to be painted. This will help to ensure a clean surface and a smooth finish when you are done.

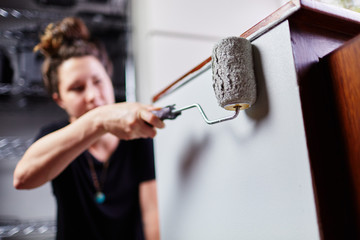
Once all of the surfaces are sanded, cleaned, and prepped for paint, you can begin to apply the first coat. This can be done with a brush or roller, depending on the surface and your preference. Be sure to back-brush the rolled paint to level it and create an even surface. This will also help to prevent any drips or smears that may occur as the paint dries.

After the first coat dries, it is time to apply another. Again, this can be done with a brush or roller, but it is best to use an angled sash brush for the corners and edges of your cabinets. This will give you a more professional look. Once the second coat dries, it is time to put your items back into the cabinets and enjoy the new look of your kitchen!

Painting your cabinets is a great way to update the look of your kitchen, bathroom or other room. Not only will it improve the look of your home, but it can also increase the value of your property if you are planning to sell it in the future.

Finish

Painting cabinets is an important step in a kitchen remodel, and there are several factors to consider when choosing the best finish. It’s important to use a high-quality, durable paint that will withstand the wear and tear of everyday use. It’s also important to apply thin coats of paint to avoid streaking and create a smooth, even surface. Finally, it’s important to keep a clean workspace during the process to prevent dust or hair from getting into the finished product.

Many homeowners choose to paint the inside of their cabinets for a number of reasons. Some may prefer a more neutral color that blends with the exterior of their home, while others might want to add a pop of color for a more dramatic look. Whatever the reason, painting cabinetry is a great way to update your kitchen without spending a fortune.

There are some wood species that take paint better than others. Close-grained woods like maple, poplar and MDF work well with paint because they don’t absorb the color into the grain, resulting in a smooth finish. On the other hand, open-grained woods like oak and ash will show a lot of the grain under the paint, which can make it difficult to achieve a smooth finish.

When applying the paint, you’ll want to start with a roller on flat surfaces and then switch to a brush for hard-to-reach areas. It’s important to use a quality paint that is specifically designed for interior use and to follow the manufacturer’s instructions for application. You’ll also want to make sure that you have enough ventilation during the application process to help keep the air moving and reduce the chances of a smudge or bubble.

After applying your first coat of paint, let it dry completely before you apply a second. You can use fans or open windows to help keep the air moving, and this will speed up the drying time. Once the second coat has dried, lightly sand with 220-grit sandpaper to create a smooth, even surface and wipe away any dust particles before applying a third coat.

Home Improvement

Cabinet Refinishing – Give Your Cabinets a Facelift

Cabinet Refinishing San Jose CA is a process of keeping your existing cabinets and changing their color or finish via chemical stripping and hand sanding. It’s ideal if you only have cosmetic issues, like scratches, dents, and faded colors.

Cabinet Refinishing

Keep in mind that refinishing isn’t an option for solid-color cabinets since the material beneath them is usually not stainable. However, painting is an option.

Refinishing your cabinets is a cost-effective solution to give your kitchen a style update that will last for years to come. Rather than replacing your cabinets, which could cost you anywhere from $4,000 to $9,500, you can save money and still get the modernized look you desire for your home by simply refinishing them.

When it comes to remodeling your kitchen, cabinet refinishing is an affordable option that will not only help you improve the overall look of your home but also increase its value. Replacing cabinets can be very expensive and time consuming, but with the right contractor, your cabinet refinishing project will go quickly and be more cost-effective than you might think.

The final cost of your cabinet refinishing will depend on the type of finish you choose. Whether you decide to paint, stain, glaze, or shellack your cabinets, they will all need to be stripped and sanded before the new finish can be applied. Stripping is a messy job that will involve the use of chemical strippers, so you will want to find a company with experience in this type of work.

Painting is a popular choice for homeowners as it can provide a variety of color options. Stain, on the other hand, can give your cabinets a more natural or earthy look that will highlight the grain of your cabinetry. Both stains and paints will need to be regularly maintained to ensure that they last for as long as possible.

One of the biggest reasons to consider refinishing your cabinets is that it’s an eco-friendly option. Ripping out old cabinets and throwing them away is harmful to the environment because it wastes natural resources and contributes to landfills. By refinishing your cabinets, you can give them a new life without wasting any materials.

Refinishing your cabinets will also reduce the amount of waste that ends up in landfills, as opposed to refacing them, which typically uses laminates for the doors, gable ends, boxes, and styles. This can cause delamination, which is a process in which the glue connecting the laminate to the wood material breaks down.

Modernize Your Kitchen

Cabinets are the centerpiece of your kitchen, and they can have a large impact on how your home feels overall. When they start to look old or outdated, it can make the entire space feel tired and stale. Refinishing is a great option to give them a facelift, allowing you to update the style to something fresh and modern.

The main advantage of refinishing is that you can change the color to something new without having to remove the doors and drawer fronts. This allows you to completely transform the look of your cabinets, even if they’re in good shape. Whether you’re moving from a rich, rustic aesthetic to a more contemporary white kitchen, or you’re simply looking to brighten up your space, the right paint and stain can make all the difference.

Another benefit of refinishing is that it’s eco-friendly. It isn’t as wasteful as replacing the cabinets, which can require extensive demolition and construction to remove and install the new pieces. Refinishing is also more environmentally conscious than refacing, which uses new cabinet boxes and covers them with veneers that match the door and drawer fronts.

Although it is possible for homeowners to do refacing on their own, it can be time-consuming and frustrating. If you’re not a skilled DIYer, or your cabinets are in need of significant repairs, it’s best to leave the job to professional painting contractors who specialize in remodeling projects.

Depending on the extent of the remodel, it’s a good idea to do other improvements at the same time as refinishing your cabinets. For example, if you’re going from a dark wood finish to a light stain, it’s a great time to do a complete kitchen hardware upgrade as well. This way, when you put the doors and drawers back in place, it will feel like a whole new room.

If you’re ready to give your kitchen a facelift, the first step is often cabinet refinishing. The right contractor can help you create a style that fits your home perfectly and won’t break the bank. From there, you can explore other ways to upgrade your kitchen without blowing your budget.

Aesthetically Pleasing

Cabinet refinishing is a great way to update the overall look of your home. By choosing a new paint color or wood stain, you can create a design that is unique and reflects your personal style. This can also increase your home’s resale value, as buyers will be more likely to appreciate the aesthetic and functionality of your kitchen.

Whether your cabinets are stained or painted, they will need to be prepped before applying the new finish. This includes cleaning, sanding, and priming. Proper preparation is critical to the longevity and quality of the finished product.

Thoroughly cleaning the cabinets will remove any dirt, grease, or grime that has accumulated over time. Special care should be taken around areas where hands frequently come into contact with the cabinets, such as near stove handles and hinges. If necessary, these areas can be addressed with stronger cleaners, such as trisodium phosphate (TSP), to help break down stubborn grease buildup. Once all surfaces are cleaned, they should be lightly sanded with a medium-grit sandpaper to smooth them and provide a good base for the new finish. This should be done very carefully, and the sanded surface should then be wiped down with a tack cloth to clean off any residual dust and debris.

After sanding, the cabinet surfaces should be primed. This will help to ensure that the paint adheres well and prevent stains or wood tannins from bleeding through the new finish.

Another important step in the prep process is filling dents, scratches, and holes in the cabinets. Using wood filler, which is like sculpting with putty, allows for a seamless repair. This will ensure that the final sanding and painting will be free of visual interruptions that can detract from the overall appearance.

When looking for a company to do the cabinet refinishing, it is best to choose one that has experience and a proven track record. Ask for recommendations from friends and family, and always read online reviews. Once you have found a few potential companies, compare prices and services offered before making a decision.

Less Expensive Than Replacement

Cabinet refinishing saves money over the cost of buying and installing new cabinets. It also reduces the amount of waste that goes into landfills because old cabinets aren’t discarded and replaced with new ones. In addition, it helps protect your family from the hazards of broken wood splinters and outdated hardware. Cabinet refinishing can strengthen and reinforce your existing cabinets, making them safer to use. This is especially important for children and elderly family members.

Unlike refacing, which includes cabinet doors and drawer fronts, refinishing only addresses the exteriors of your existing cabinets. This makes it more affordable and less invasive, but it will not fix issues with sagging or worn surfaces. However, it will address the visual impact of your kitchen by restoring old or outdated colors and giving them a fresh look.

Refinishing your cabinet doors is not as simple as it sounds. It takes three to four days to complete and requires that you make plans to be away from home while the crew works in your kitchen. This is because the spraying of lacquer gives off volatile fumes that can remain in the air for a day or more.

This process also does not allow you to change the style of your door. If you want to go from a light color to a dark shade, for example, your cabinet doors will need to be stripped and the profile altered before they can be painted with a new coat.

The cabinet refacing process is more extensive than refinishing and requires that your cabinet boxes be in good condition. If they’re not, you will need to have them repaired or replaced before refacing. Refacing can be done with a veneer kit, which contains wood veneers and application materials, or you can work with a custom cabinet maker.

The only material that cannot be refaced is thermofoil and laminate, which will need to be removed and replaced because paint does not adhere well to these materials. This is why refacing is more expensive than refinishing. It will also require that you remove and replace your existing hinges, handles, and hardware.